Crack WEP/WPA/WPA2 Password Without Brute force – Fluxion
Disclaimer : Use this tool only on networks you own .Don’t do anything illegal.
Step 1Just Double Checking
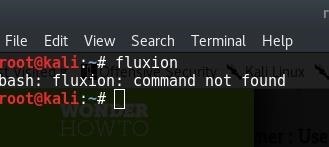
The first thing I did was make sure that Kali doesn’t already have this tool. Maybe if you are reading this post a long time after it was written, then you might have the tool pre-installed in Kali. In any case, try this out:
fluxion
I, personally tried to check if linset or fluxion came pre-installed in Kali (though I didn’t expect them to be there).
Step 2Getting the Script
Getting the script is just a matter of cloning the github repository. Just use the git command line tool to do it.
git clone https://github.com/deltaxflux/fluxion
If you have any problems with this step, then you can just naviagate to the repostitory and manually download the stuff.
Step 3Running the Script
Just navigate to the fluxion directory or the directory containing the scripts in case you downloaded them manually. If you are following the terminal commands I’m using, then it’s just a simple change directory command for you:
cd fluxion
Now, run the script.
sudo ./fluxion
Dependencies
If you have any unmet dependencies, then run the installer script.
sudo ./Installer.sh
Anyways, one way or the other, your unmet dependencies will be resolved, and then you can use Flexion.
PS: For those trying to use apt-get to install the missing stuff – some of the dependencies aren’t available in the default Kali repos, so you’ll have to let the script do the installation for you, or manually add the repos to /etc/apt/sources.list (look at the script to find out which repos you need to add)
Step 4Fluxion
Once again, type the following:
sudo ./fluxion
This time it should run just fine, and you would be asked a few very simple questions. For the wireless adapter, choose whichever one you want to monitor on. For the channels question, choose all, unless you have a specific channel in mind, which you know has the target AP.
Then you will see an airodump-ng window (named Wifi Monitor). Let it run while it looks for APs and clients. Once you think you have what you need, use the close button to stop the monitoring.
You’ll then be prompted to select target.
Then you’ll be prompted to select attack.
You choose an attack. I am going to choose the Hostapd (first one) attack.
Then you’ll be prompted to provide handshake.
If you don’t have a handshake captured already, just press Enter and then the script will help you capture one. It will send deauth packets to achieve that.
I’ll use aircrack-ng (the first one).
And Deauth all.
Then you can see the targets deauth .
Press 1 to Check handshake . if done you will see this:
I prefer Web Interface (The first one).
Then Select Your language.
As you can see lots of windows opened , The fake page will be sent to the victim , and then the victim will think it’s just deauth of wifi network and he will enter the password again , and the attacker will receive it.
Disclaimer : Use this tool only on networks you own .Don’t do anything illegal.
modified


